if your current deployment steps look like anything other than this:
git add .
git commit -m "update"
git push
Then you are in the right place to learn how to automate deploying your local git changes to your production domains.
This method will have your changes pushed to prod in seconds, not minutes, hours, and without any use of manual scp ,rsync, zipping files, etc.
prerequisites
- a Github account
First, make a new subdir in the root of your project, named .github
mkdir .github
in that dir, make a workflows dir
mkdir workflows
in that dir, make a new file, named deploy.yml
nano deploy.yml
This is the YAML file that will tell Github how to process your deployment
name: Deploy to EC2

on:
  push:
    branches: [ main ]

jobs:
  deploy:
    runs-on: ubuntu-latest
    steps:
    - name: Checkout code
      uses: actions/checkout@v3

    - name: Install SSH key
      uses: shimataro/ssh-key-action@v2
      with:
        key: ${{ secrets.EC2_SSH_PRIVATE_KEY }}
        known_hosts: ${{ secrets.KNOWN_HOSTS }}

    - name: Deploy to EC2
      env:
        EC2_HOST: ${{ secrets.EC2_HOST }}
        EC2_USER: ${{ secrets.EC2_USER }}
        EC2_PORT: ${{ secrets.EC2_PORT }}
      run: |
        ssh -i $HOME/.ssh/id_rsa -o StrictHostKeyChecking=no -p $EC2_PORT $EC2_USER@$EC2_HOST '
          bash /home/youruser/myproject/deploy.sh
        '
Leave the youruser and myproject for now and update it later.
For github to process your request securely, you want to use strong encryption. We will select ed25519 as our encryption algorithm.
ssh-keygen -t ed25519
If you want to add a comment to your key, add -C "comment" to the command, this can help remind you what you made it for.
Ensure that you know where you are saving the new key to and give it a descriptive name:
~$ ssh-keygen -t ed25519 -C "demonstration"
Generating public/private ed25519 key pair.
Enter file in which to save the key (/home/myusername/.ssh/id_ed25519): /home/myusername/.ssh/demonstration
Enter passphrase (empty for no passphrase):
Enter same passphrase again:
Your identification has been saved in /home/myusername/.ssh/demonstration
Your public key has been saved in /home/myusername/.ssh/demonstration.pub
The key fingerprint is:
SHA256:FxztaBJmxzHT721RfPYIncRRdQET1ljDxJhdjS1OpDg demonstration
The key's randomart image is:
+--[ED25519 256]--+
|         .=+ X^%X|
|        +.o===O=X|
|       o oEo.= ++|
|        . oo. +..|
|        So.  . ..|
|         .    . o|
|               . |
|                 |
|                 |
+----[SHA256]-----+
notice I entered the path for the file when I made the key:
/home/myusername/.ssh/demonstration
so now the private keys name is 'demonstration' and its public key is 'demonstration.pub', and it is saved in my users .ssh folder
~$ ls -alph
...
drwx------  2 myusername   myusername   4.0K Oct  6 16:07 .ssh/
..
~$ cd .ssh
~/.ssh$ ls -alph
-rw-------  1 myusername myusername  399 Oct  6 16:07  demonstration
-rw-r--r--  1 myusername myusername   95 Oct  6 16:07  demonstration.pub
On github, add the new private key and create the repo secrets for your deployment
1. Add private key:
(Your Repo > Settings > Deploy keys)

- When adding the private key, you may enable it as a 'read only' key if you do not want your remote domain to write changes to your repo. I always enable this as I will only push changes from local, not my domain.
2. Add secrets:
(Your Repo > Settings > Secrets and variables: Actions)
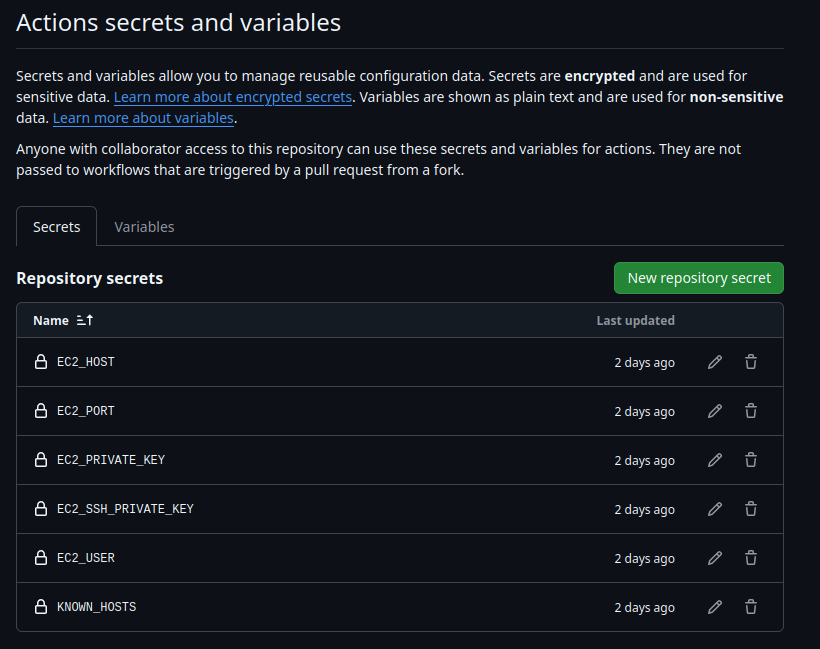
For this example I'm creating the following Actions secrets and variables:
- EC2_HOST: the domain (e.g. @[email protected])
- EC2_PORT: if you use a specific port for SSH enter it here
- EC2_PRIVATE_KEY: the plain text of the private key we just made
- EC2_USER: the username you use to perform daily tasks with on the domain.
- EC2_KNOWN_HOSTS: *known hosts is optional. you can scan your domains known hosts and provide github the known sha sums that you know your domain by, so that github will only continue if your domain provides one of those sha sums that your localhost recognizes.

- I have an extra secret "EC2_PRIVATE_KEY" that is not mentioned in the
yamlscript so just disregard that.
3. Add the public key to your domains users authorized_keys file:
# on local
cat demonstration.pub # copy the text of the public key

# on remote
nano ~/.ssh/authorized_keys
# make a newline and paste your public key
#CTRL + S to save changes, CTRL + X to close the file
So far we have created the deploy.yml, new ssh keys, and configured github actions. Now we must create the deploy.sh bash script.
In the root of your dir on localhost, create deploy.sh
cd myproject
nano deploy.sh
Here is an example deploy.sh:
#!/bin/bash
set -e

# Navigate to the project directory
cd /home/myusername/myproject

# Pull the latest changes
git pull origin main

# Function to stop the existing application
stop_app() {
    if pgrep -f goserver > /dev/null; then
        echo "Stopping existing application..."
        pkill -f goserver
        sleep 5
    fi
}

# Stop the existing application
stop_app

# Start the application in the background
nohup ./goserver > app.log 2>&1 &

# Wait for the application to start
sleep 5

# Check if the application is running
if pgrep -f goserver > /dev/null; then
    echo "Deployment completed successfully! goserver is running."
else
    echo "Deployment failed: goserver is not running"
    exit 1
fi
With this deploy.sh, we are essentially saying:
- Pull changes from your github repo to your remote domain
- Stop and restart the web service in the background
- Provide a status message
Note: This script assumes that your web server is started/stopped by an executable script. In my case using a Golang backend webserver, I have a .exe that is named 'goserver', which performs tests and is compiled at runtime.
If you are using a different backend web server just ensure that you are starting it similarly at this step.
After this is made, make it executable and push your changes to github:
chmod +x deploy.sh
git add . # Add all changes
git commit -m "demonstration"
git push
Now we can go to the Actions tab under our repo:

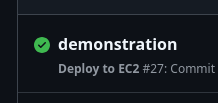
The actions are now being processed (small green dot):

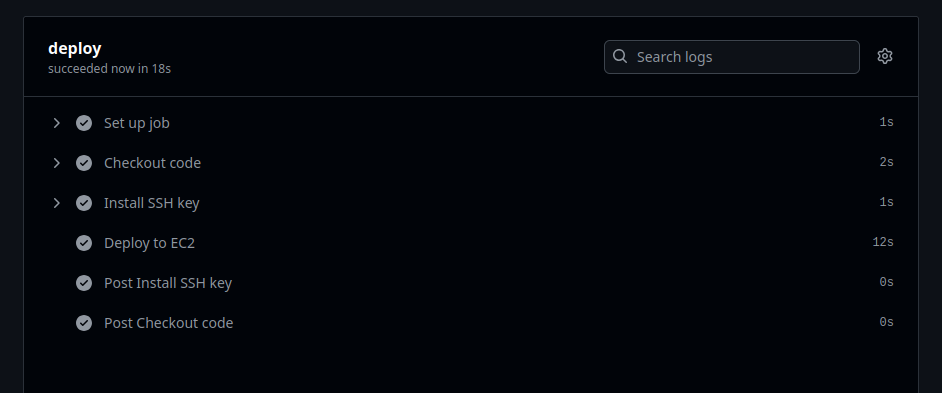
Examine the actions status:

Verify completed actions deployment:

- If you run into issues, ensure that the deploy.sh script is made executable on your remote host and that your account has the privileges to run the script.
That's it.
Your local changes are now pushed to prod.